Alias accounts are a bit of an unknown feature for many, and oftentimes people have different views about what they actually do or what they can be used for. Gmail allows you to "link" other email accounts, called aliases, to your main account. This then allows you to send emails from any linked account, all within the same Gmail account. Depending on your use case, you can also configure Gmail to receive emails from these alias accounts.
Why Choose an Email Alias
There are a number of reasons why you'd want to link another email account as an alias, a few of which we'll describe here:
Work Emails
Many people have email accounts for both personal use and for work. Depending on the amount of email you receive, this can become difficult to manage, especially since your personal and work emails may use different email clients, increasing the complexity. Adding your work email as an alias to your personal email account can help save you time by allowing you to do all of your email work from within the same inbox.
Privacy
Privacy is increasingly becoming a concern for many, especially given how much big tech companies tend to track their users. Another use-case for alias accounts is to create and link an email used solely for times when you want to remain anonymous/private. This way you can easily switch email addresses in your "Compose" window to one that doesn't easily trace back to you. This can be good for signing up for newsletters or user accounts in 3rd party sites. If you find that your email address was leaked or sold to an ad company, you can easily unlink that alias and stop receiving the unwanted email.
Role Emails
Let's say Michael works in your HR department and creates a job posting online looking for new talent. He may ask potential candidates to send their resumes, but doesn't wish to reveal his personal email ([email protected]). Instead of publicly displaying his personal email for the job posting, he can instead set up an alias account and receive all resumes in the same inbox without exposing his ID. For example, this new email could be something like [email protected].
Similarly, alias addresses can also be used to identify one's department or position. For example, [email protected] doesn't tell much about what you do, but [email protected] clearly tells people who you are and your position at the Acme company. This can improve communication and make internal emails very easy to identify.
How to Add an Alias to Gmail
Linking an alias email is very easy and straightforward in Gmail. Here's a step-by-step guide:
- Login to your Gmail account and click the gear icon in the top right corner of the screen.

- You will then see a pop-up window. Choose "See all settings" at the top, which will then take you to the Settings page.
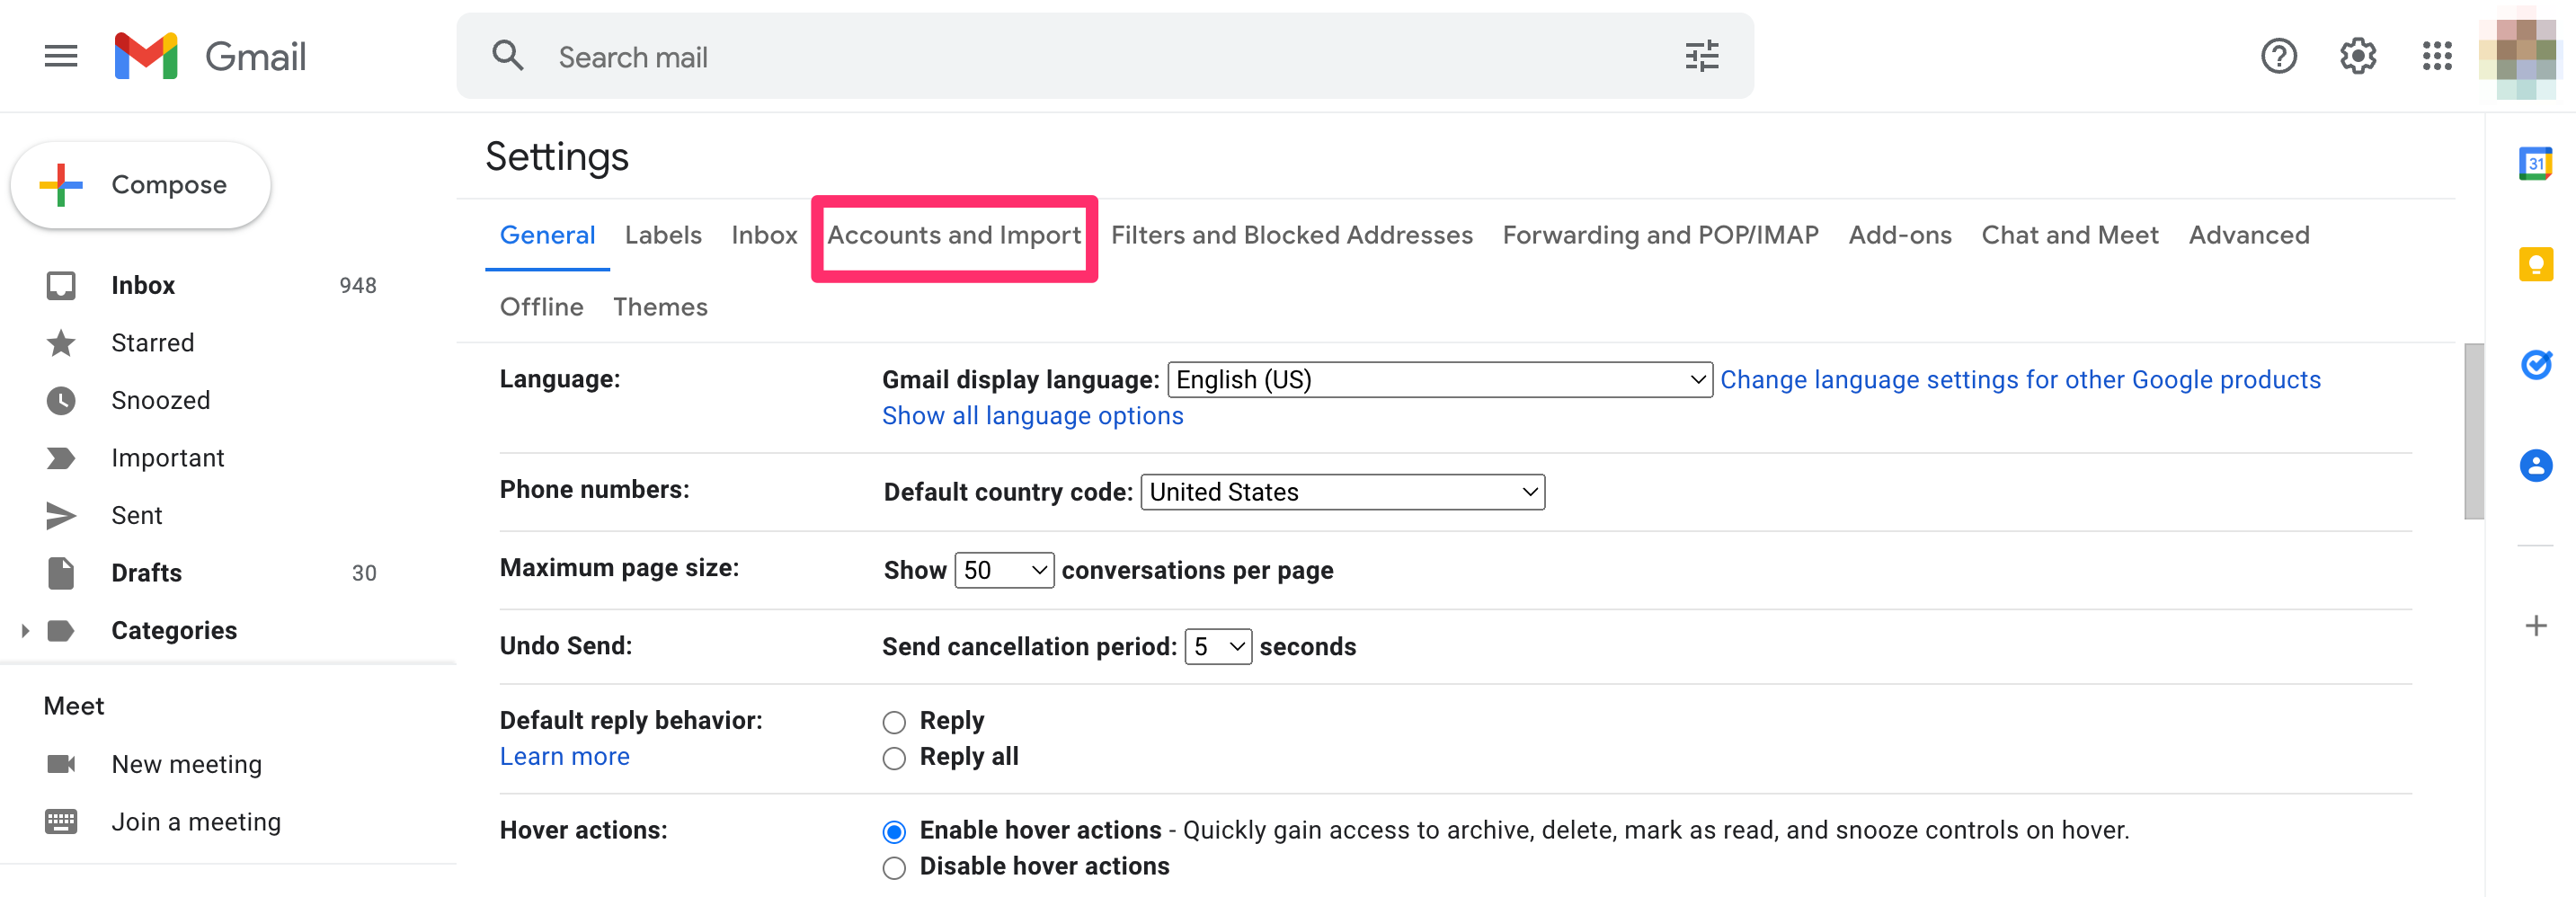
- Select the "Accounts and Import" tab on the Settings page, which contains the menu for managing alias accounts.

- You should now see the "Send Email As" section of your settings. Click the "Add Another Email Address" link.

- Type in the email address of the account you'd like to link.
- Select the "Treat as an alias" checkbox and click the "Next Step" button.
- You should now receive a verification email at the email address you're trying to link. This is Gmail's way of verifying that you actually own this email and have permission to send email from it. Follow the steps in the verification email to finish linking your account.
You can follow these same steps to create multiple aliases – up to 30 per Gmail account.
Now that you've linked an account, you will be able to edit/remove linked accounts by going to the "Accounts and Import" section. More importantly, you'll be able to send emails from this linked account, all within the main email account.
You can also configure your Gmail account to fetch mail from these linked accounts, which you set up via the "Check mail from other accounts" section of the settings menu.

Now, to actually send emails from your alias address, go back to your inbox and click the "Compose" button to send a new email. Then click on the "From" line and choose the email address that you wish to send from, as shown here:

Set Address for Responding to Emails
If you want to respond to emails from the same address that they were sent to, you can configure this setting in Gmail. This way, you won't have to change the "From" field address manually each time. To do so,
-
Go to the "Accounts and Import" tab in Gmail settings.
-
Select "Reply from the same address the message was sent to."

How to Remove an Email Alias
Let's say you've linked a work email to your personal Gmail account, but you no longer work at that company. In cases like these, you'll want to remove your work email that you linked as an alias while still an employee. To do this, you'll follow similar steps as when you linked the email account:
- Login to your Gmail account and click the "Settings" icon, just like we did earlier.
- You will then see a pop-up window. Click the "See all settings" button at the top.
- Select the "Accounts and Import" tab on the Settings page.

- You will see a "delete" button next to your alias emails. Click "delete" on the alias email you wish to remove.
After doing this, you will not be able to send or receive any emails using that email address. However, you can always re-link the alias account if needed.
Conclusion
In this article, we explained what aliases are in Gmail, why we might want to use them, how to add them to our account, and how to remove them. Aliases can be a powerful and time-saving tool. Managing email can be a difficult task, especially when you have multiple accounts, like work and personal accounts. However, using aliases can save you time by merging two inboxes into one, among many other uses.
